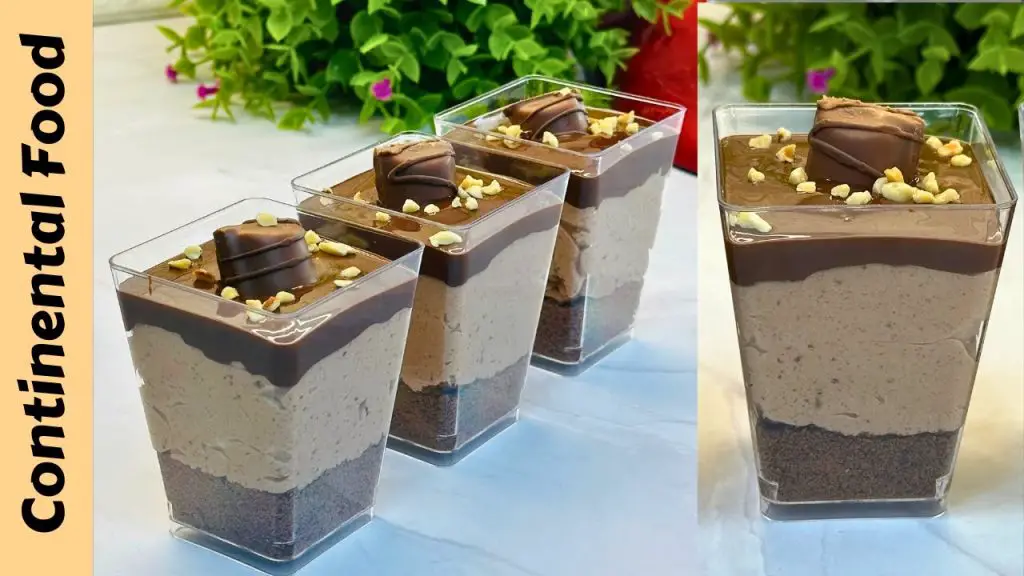
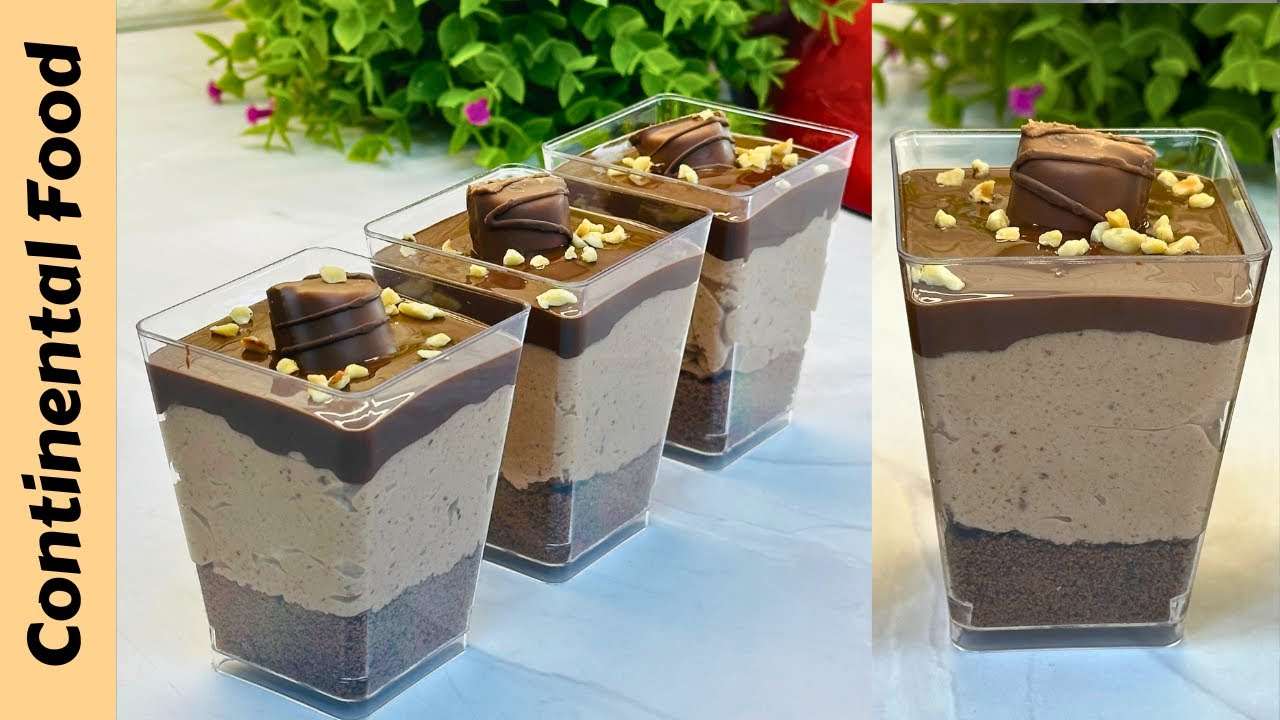
Hi there, chocolate lovers! I’m going to bring you a special treat today that will make your taste buds happy. On those easygoing, chill days when you really want something sweet and indulgent, this meal is just what you need. You can use these Kinder Chocolate Dessert Cups for your child’s lunch, a small party, a teatime treat, or to satisfy your late-night sweet tooth.
This is a recipe I’ve made many times, and every time it turns out great. It’s so great that even my daughter Irsa loves it! So, let’s not wait any longer for your sweet dreams. Enjoy how easy this recipe is and let the rich, creamy tastes speak for themselves.
Kinder Chocolate Dessert Cups Recipe
Ingredients:
- 200g any chocolate biscuits
- 200g Kinder chocolate bars (or substitute with your preferred milk chocolate)
- 200ml whipping cream
- 1 tablespoon crushed nocciola (hazelnuts)
- Kinder Bueno bars or any other Kinder products for garnish
Equipment:
- Electric mixer or whisk
- 4 dessert cups or glasses
- Piping bag (optional, for a neater presentation)
Instructions:
Get the base ready:
Crush the chocolate cookies until they are very small and crumbly. To do this, put the biscuits in a bag that can’t be opened and use a rolling pin or food mixer to gently pound them.
Spread the crushed cookies out evenly in your serving cups and press them down a little to make a stable base. This will add a nice crunch to your dessert.
To make the chocolate layer,
Shred the Kinder chocolate bars into little chunks and melt them. If you use a microwave, make sure to stir the chocolate every 30 seconds to keep it from burning. For a more controlled melt, use a double pot on the stove.
After the chocolate melts, wait a minute or two and then pour it over the cookie base in the cups. Tap the cups gently to make sure the chocolate layer is level.
Make the cream fluffy:
Whip the cream in a bowl until it makes soft peaks. For a touch of luxury, add the crushed nocciola and gently fold it into the cream to keep its light, airy texture.
Put the dessert cups together:
Add whipped cream on top of the chocolate layer in each cup by spooning or pipe it on. This will make a rich, creamy layer on top.
Let the layers set and the tastes blend well by putting the dessert cups in the fridge for at least an hour.
Add a garnish and serve:
Put a Kinder Bueno or your other favorite Kinder treat on top of each cup to get it ready to serve. This makes your dessert cups look even better and gives them an extra chocolatey treat.
Have fun with your sweet and salty Kinder Chocolate Dessert Cups!
Don’t forget that this meal is all about what you can do with it. You are welcome to change the sweetness or textures to your liking. These Kinder Chocolate Dessert Cups are sure to make you smile, whether you’re eating them with friends or by yourself.
Make sure to tag your tasty treats with #continentalfood #kinderchocolate #kinderchocolatedessertcup #kindercup #chocolatedessert when you post them. Let’s get chocolate to more people!
Kinder Chocolate Dessert Cup Recipe
Course: DessertCuisine: ContinentalDifficulty: Easy4
servings30
minutes40
minutes300
kcalKinder Chocolate Dessert Cups are a tasty treat that combines the rich, creamy taste of Kinder chocolate with the light, airy texture of whipped cream. The crunchy chocolate cookies and unique hazelnut flavor make these cupcakes even better. This dessert is so rich that it’s sure to please!
Ingredients
200g any chocolate biscuits
200g Kinder chocolate bars (or substitute with your preferred milk chocolate)
200ml whipping cream
1 tablespoon crushed nocciola (hazelnuts)
Kinder Bueno bars or any other Kinder products for garnish
Directions
- Get the biscuit base ready: Crush up the biscuits: Put the chocolate cookies in a plastic bag and use a rolling pin to break them up into small pieces. You can also use a food processor to make the mixture fine and sandy.
- Put together the base: Spread the crushed cookies out evenly in the dessert cups and lightly press them down to make a layer. This is what your dessert cups will be built on.
- Make the layer of Kinder chocolate: Break up the chocolate bars into little chunks and melt them. You can use a 30-second microwave burst and stir in between, or you can use the double boiler method and put a heat-proof bowl over a pot of boiling water, making sure the bowl’s bottom doesn’t touch the water.
- Cool the Chocolate: Make sure the melted chocolate stays wet even though it cools a bit.
- Make the cream fluffy: Put the cream in the fridge: Make sure the cream for whipping is very cold. This will help it whip better.
- Beat the Cream: Either use an electric mixer or a whisk to beat the cream until it makes soft peaks. If you whip it too much, it can get too stiff and butter-like.
- Mix the chocolate and cream together; then, fold the chocolate in. Try to keep the mixture as light as possible as you slowly fold the melted Kinder chocolate into the whipped cream. This will make a chocolate cream that looks like mousse.
- Add the chocolate cream and then stack the dessert cups. Cover the biscuit base in the dessert cups with the chocolate cream filling. You can spoon or pipe it on top. Gentle tap the cups on the counter to get rid of any air bubbles and make the tops smooth.
- For a garnish, add crushed nocciola. For a crunchy, nutty taste, sprinkle the crushed nocciola on top of the chocolate cream layer.
- Put Kinder Bueno on top: For an extra sweet touch, add pieces of Kinder Bueno or any other Kinder chocolate product of your choice.
- Chill: Put the dessert cups in the fridge. Give them at least an hour to set while they chill. To make the tastes go together even better, do this.
- Serve: Have fun with your dessert: The Kinder Chocolate Dessert Cups should be taken out of the fridge once they are set. Enjoy the wonderful mix of textures and the rich, creamy chocolate taste when you serve it cold.
- Remember that you can always change how sweet or how thick something is to suit your tastes. To make this dish your own, feel free to try it with different types of chocolate cookies or toppings.
Recipe Video
Notes
- Smooth Chocolate Layer: When melting the chocolate, be careful not to overheat it as this can cause the chocolate to seize and become grainy. Using a double boiler can give you more control and prevent the chocolate from burning.
- Customize Your Crunch: Feel free to experiment with different types of biscuits for the base layer. Each type will give a different texture and flavor.
- Digestive biscuits, graham crackers, or even Oreo cookies (with the filling removed) can be great options.
- Layering: When layering the chocolate and the whipped cream, try to keep the layers distinct and smooth for that visually appealing stratification. A piping bag can be a great tool for neatly adding the whipped cream layer.
- Experiment: Don’t be afraid to add your twist to this recipe! Maybe mix in some caramel with the chocolate layer or add a hint of coffee to the whipped cream for a mocha flavor.
Also, for more delightful recipes and tips, consider following the Continental Food channel on YouTube. You can find them here: Continental Food Channel.
I really hope you had fun making and eating these tasty Kinder Chocolate Dessert Cups. It’s always fun to share these sweet treats with other chocolate lovers. If you decide to try this recipe, please let me know how it goes.
Your comments are very helpful, and they motivate me to keep making things and getting better.
Please feel free to share your thoughts, experiences, or even ideas for future recipes in the box below. I want to hear about any changes you made to this recipe or any new dessert ideas you’re interested in.
Your ideas are a big part of what makes our food community so lively and fun.
Remember that each delicious bite is something to enjoy, share, and be happy about. It’s okay to share love one Kinder Chocolate Dessert Cup at a time.
Happy eating until our next sweet meeting! 🍫💖