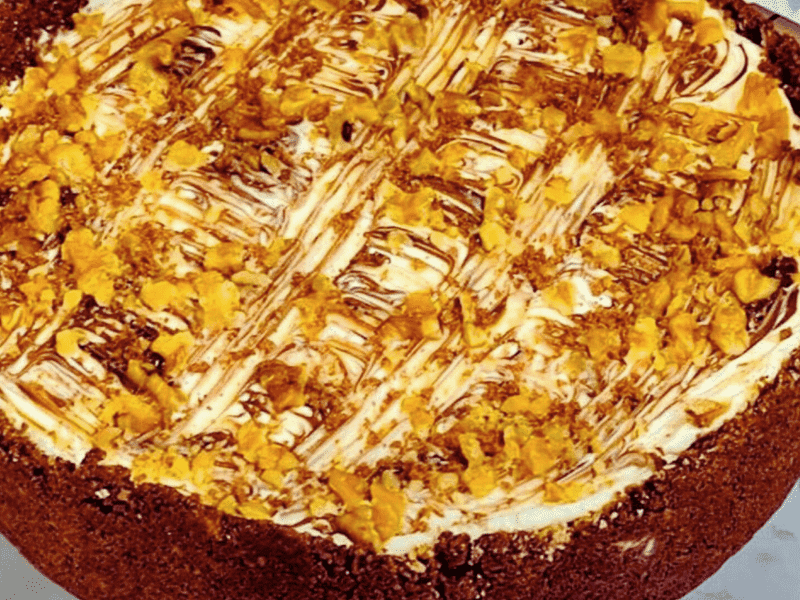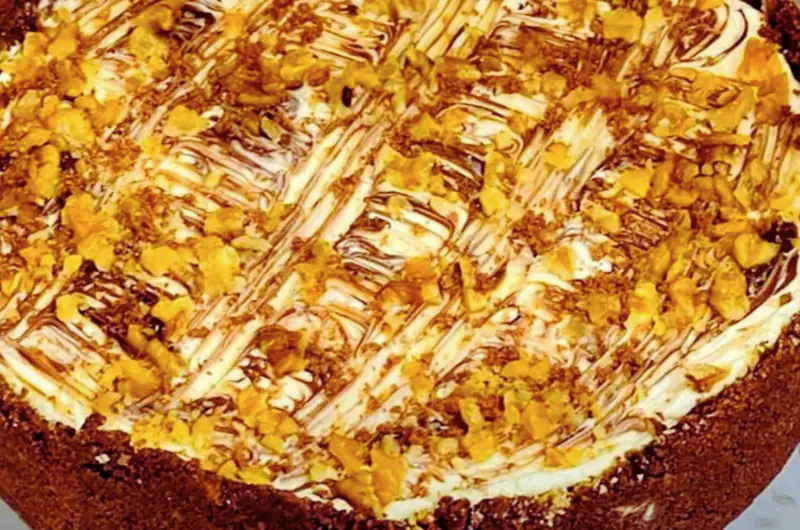
Chocolate Walnut Cake Without Oven: The Ultimate Cake Recipe
Indulge in the exquisite delight of our Chocolate Walnut Cake, a creation that’s easy to make without an oven. This sumptuous dessert boasts a crunchy chocolate biscuit base, a luscious cream cheese and Nutella filling, and a velvety smooth topping. Get ready to embark on a cake-making adventure with this Best Ever Cake Recipe.
Ingredients:
- 200g chocolate biscuits, finely crushed
- 100g unsalted butter, melted
- 50g chopped walnuts
- 18cm cake mold
- 200g cream cheese, softened
- 2 tablespoons Nutella chocolate spread
- 200g double cream
- 50g powdered sugar
- 200g cream cheese, softened (for white cream)
- Chopped walnuts and chocolate, for garnish
Steps to Craft this Divine Chocolate Walnut Cake:
Step 1: Prepare the Chocolate Biscuit Base Begin by finely crushing the chocolate biscuits. You can use a food processor or place them in a sealed plastic bag and crush them using a rolling pin.
In a mixing bowl, combine the crushed biscuits with the melted unsalted butter. Stir until the mixture resembles wet sand.
Step 2: Create the Base Layer Take your 18cm cake mold and line it with parchment paper. Press the biscuit mixture firmly into the base of the mold, creating an even layer. Ensure it’s compact and well-distributed.
Step 3: Add Chopped Walnuts Sprinkle the chopped walnuts evenly over the biscuit base. Gently press them into the mixture to ensure they adhere.
Step 4: Prepare the Cream Filling In another mixing bowl, blend 200g of softened cream cheese with Nutella chocolate spread until it’s smooth and well combined.
Step 5: Whip the Double Cream In a separate bowl, whip the double cream and powdered sugar until it reaches stiff peaks.
Step 6: Combine Cream Cheese and Whipped Cream Carefully fold the whipped cream into the cream cheese and Nutella mixture. Fold gently to maintain the fluffy texture.
Step 7: Layer the Filling Pour this delectable cream cheese and Nutella mixture over the biscuit and walnut base, ensuring an even layer.
Step 8: Refrigerate to Set Place the cake mold in the refrigerator and let it chill for at least 4-6 hours or until the cake is set.
Step 9: Create the White Cream Layer Once the cake is set, prepare a white cream layer by blending 200g of softened cream cheese until it’s smooth and creamy.
Step 10: Add the Final Layer Spread the white cream evenly over the chilled cake, creating a pristine top layer.
Step 11: Garnish and Serve Garnish your Chocolate Walnut Cake with chopped walnuts and chocolate for an elegant touch.
Optional: You can also drizzle extra Nutella or chocolate sauce for added indulgence.
There you have it—a delectable Chocolate Walnut Cake that’s sure to steal the show. It’s perfect for any occasion, and the absence of an oven makes it accessible to everyone. Share this delightful treat with friends and family, and savor the layers of flavor in each heavenly bite. Enjoy! 😋🍰🍫
Savoring Your Scrumptious Chocolate Walnut Cake: A Slice of Bliss
Congratulations on creating your irresistible Chocolate Walnut Cake! Now, it’s time to enjoy this delectable dessert to the fullest. Here are some tips and serving suggestions to make your cake experience even more delightful:
1. Chilling Time: The key to a perfect cake texture is giving it enough time to chill and set. While 4-6 hours is recommended, leaving it in the refrigerator overnight allows the flavors to meld and develop even further.
2. Perfect Presentation: To release the cake from the mold, run a knife along the edges to loosen it gently. Place a serving plate on top of the mold, invert it, and tap the bottom to release the cake. Carefully remove the parchment paper.
3. Additional Garnishes: Get creative with your garnishes. In addition to chopped walnuts and chocolate, consider using grated chocolate, cocoa powder, or fresh berries for an elegant touch.
4. Serving Size: This cake is rich and decadent, so slice it into thin pieces when serving. A little goes a long way in satisfying your sweet tooth.
5. Customize the Nutella Layer: Adjust the amount of Nutella to your taste. If you want an extra chocolatey kick, add a bit more. Remember that Nutella is sweet, so consider that when adding powdered sugar.
6. Make It Your Own: Experiment with different toppings or fillings. You can add a layer of fruit preserves, caramel sauce, or even a drizzle of melted chocolate for a personalized touch.
7. All-Season Treat: While this cake is a delightful dessert year-round, it’s particularly fantastic for special occasions and celebrations. Birthdays, anniversaries, or simply as a sweet ending to a memorable meal, it’s a versatile treat for any event.
8. Storing Leftovers: If you somehow have leftovers (which might be rare with this cake), store them in an airtight container in the refrigerator. The cake will remain fresh for a few days.
Now, gather your loved ones, slice into your Chocolate Walnut Cake, and indulge in a slice of pure delight. Each layer, from the crunchy biscuit base to the creamy Nutella and cream cheese filling, offers a symphony of flavors and textures that will leave your taste buds singing. Enjoy your cake, and may it bring joy to every moment it graces! 😊🎂🍫 Visit Our YouTube Channel
Certainly! Here are some frequently asked questions (FAQs) related to making Chocolate Walnut Cake without an oven:
Q: Can I use a different type of nut instead of walnuts?
A: Yes, you can customize your cake by using your favorite nuts or omitting them altogether if you have nut allergies.
Q: What can I use if I don’t have Nutella?
A: If you don’t have Nutella, you can substitute it with other chocolate spreads or even homemade chocolate ganache for a similar flavor.
Q: Can I make this cake ahead of time for a special occasion?
A: Absolutely! This cake is a great make-ahead dessert. Prepare it the day before your event and allow it to chill overnight for the best results.
Q: Is it necessary to line the cake mold with parchment paper?
A: Lining the mold with parchment paper makes it easier to remove the cake and keeps it intact. It’s a recommended step for smooth release.
Q: Can I use store-bought whipped cream instead of whipping double cream myself?
A: Yes, you can use store-bought whipped cream to save time, but freshly whipped cream often provides a better texture and flavor.
Q: How long does the cake need to chill in the refrigerator?
A: The cake should chill for at least 4-6 hours to set properly. Chilling it longer, such as overnight, can enhance the flavors.
Q: Can I freeze the cake for longer storage?
A: While it’s possible to freeze this cake, the texture may change slightly upon thawing. If you choose to freeze it, wrap it tightly in plastic wrap and store it in an airtight container for up to a few weeks.
Q: Can I make this cake without a food processor for crushing the biscuits?
A: Yes, you can crush the biscuits without a food processor. Place them in a sealed plastic bag and use a rolling pin or the flat side of a heavy object to crush them until fine.
Q: How can I adjust the sweetness of the cake to my liking?
A: You can control the sweetness by adjusting the amount of powdered sugar and Nutella in the recipe. Taste the cream cheese-Nutella mixture before adding powdered sugar to achieve your desired level of sweetness.
Q: Can I use a different size of cake mold or pan?
A: Yes, you can use a different size mold or pan, but keep in mind that the cake’s thickness will affect the required chilling and setting time. Adjust the recipe accordingly.
These FAQs should provide guidance and answers to common questions you may have while making your Chocolate Walnut Cake. Enjoy your baking, and may your cake be a delightful and satisfying creation!

