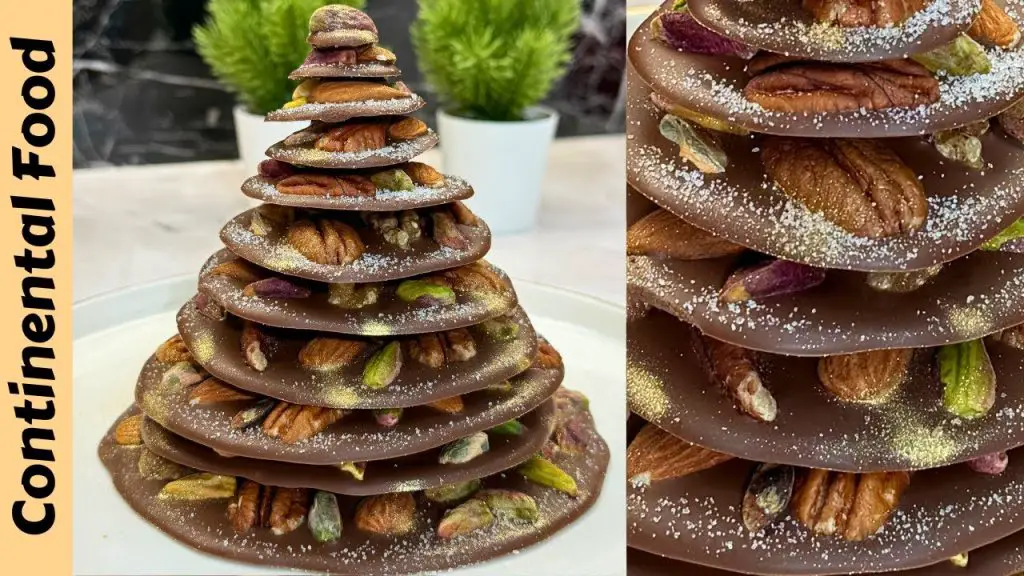
Are you ready to transform your kitchen into a magical chocolate and nut kingdom this holiday season? This DIY chocolate Christmas tree recipe is a delightful way to embrace the festive spirit while indulging in the rich flavors of chocolate and the crunch of nuts.
Christmas tree Whether you’re using a Christmas tree chocolate mould or crafting the tree by hand, this step-by-step guide will ensure your dessert becomes the showstopper of any holiday gathering.
Ingredients for the Chocolate Christmas Tree
To create this festive masterpiece, gather the following ingredients:
- 200 grams of milk chocolate
- 200 grams of dark chocolate chips
- An assortment of nuts (almonds, cashews, walnuts, hazelnuts, pistachios)
- Baking paper or parchment paper
- Cocoa powder (for a snowy effect)
- Edible glitter spray or shiny food spray (optional for decoration)
Optional extras for customization: mini cookies, dried fruits, or decorative candies. You can also use a Christmas tree chocolate mould for added precision.
Step 1: Prepare the Chocolate Base
- Place the milk chocolate and dark chocolate chips in a microwave-safe bowl.
- Heat the chocolate in 30-second intervals, stirring after each to ensure even melting. The key to a glossy and smooth mixture is patience.
- Once fully melted, mix the chocolate until it’s silky and ready for piping or pouring.
If you’re using a Christmas tree chocolate mould, pour the chocolate into the mould now, ensuring it reaches all corners.
Step 2: Create Chocolate Circles
If you’re crafting the tree without a mould, follow these steps:
- Pour the melted chocolate into a piping bag or paper cone.
- On a baking sheet lined with parchment paper, pipe chocolate into circles of varying sizes. These circles will serve as the layers of your tree.
- Sprinkle each circle generously with chopped nuts such as almonds, pistachios, and walnuts. This creates a delightful mix of textures and flavors.
For added fun, consider making chocolate Christmas tree cookies as an additional treat to accompany your tree.
Step 3: Set the Chocolate Layers
- Allow the chocolate circles to harden completely. You can refrigerate them for faster setting.
- Once firm, carefully peel the chocolate circles off the parchment paper. Handle them gently to avoid breakage.
If you used a mould, unmold the chocolate carefully once set to reveal a clean Christmas tree with chocolates.
Step 4: Assemble Your Chocolate Christmas Tree
The fun part begins—building your tree!
- Start with the largest chocolate circle as the base. Place it on a sturdy plate or cake board.
- Use a small amount of melted chocolate as glue, and stack the next smaller circle on top.
- Repeat this process until you’ve stacked all the chocolate layers, ending with the smallest circle at the top.
- Add visual interest by dotting nuts, dried fruits, or mini cookies between the layers. This brings your tree to life with texture and variety.
This method also works perfectly if you’re creating a fruit and nut chocolate bar-inspired tree, blending classic chocolate bar flavors into a stunning visual design.
Step 5: Add the Finishing Touches
To make your tree even more magical:
- Dust the entire tree with cocoa powder for a snowy look. Use a small sieve to create an even coating.
- Spray the tree with edible glitter or shiny food spray for a festive sparkle. This step transforms your tree into an eye-catching holiday centerpiece.
- Place additional chocolates, cookies, or nuts around the base for decoration. This enhances the visual appeal and makes the display look professional.
Pro Tips for the Perfect Chocolate Christmas Tree
- Chocolate Quality Matters: Use high-quality chocolate for better flavor and a smooth, shiny finish.
- Customize the Layers: Alternate between plain chocolate layers and fruit and nut chocolate bar-inspired designs for variety.
- Sturdy Base: If your tree feels wobbly, use a sturdy plate or cake board to keep it stable.
For an extra creative touch, incorporate layers made from chocolate Christmas tree cookies or decorate the tree with small Christmas tree chocolates for added charm.
Why This Chocolate Tree Stands Out
This Christmas chocolate tree isn’t just a dessert—it’s a festive experience. It combines the richness of chocolate with the crunch of nuts, creating a delightful balance of flavors. Whether you’re crafting it by hand or using a Christmas tree chocolate mould, this project is fun, engaging, and perfect for bringing the family together.
The best part? It’s highly customizable. Add layers of cookies, sprinkle on some edible gold dust, or even create a layered tree with alternating chocolate types. This recipe is as flexible as your imagination allows.
By including these keywords, this recipe ensures a strong SEO presence while providing a delightful and engaging guide for readers.
Final Thoughts
This DIY chocolate Christmas tree recipe is a perfect way to celebrate the holiday season with creativity and flavor. Whether you’re showcasing it at a party or gifting it to loved ones, this edible centerpiece is sure to impress.
So, roll up your sleeves, gather your ingredients, and step into your very own chocolate and nut kingdom. Happy holidays and happy creating!
